Installing Gkeyll
“Mostly Painless” – Petr Cagas
Installation instructions for both the gkyl simulation framework and the postgkyl postprocessing tool are provided below.
gkyl install
To install gkyl from source, first clone the GitHub repository using:
git clone https://github.com/ammarhakim/gkyl.git
Navigate into the gkyl directory to begin.
In many cases, an installation of gkyl will involve building most of gkyl’s dependencies only require a modern C compiler and Python 3.11.
The build is in two stages. In stage 1, gkyl builds the library gkylzero.
gkylzero has the following dependencies:
C compiler (C99 standard)
OpenBLAS >= 0.3.23 (On Mac OSX, users can just use -framework Accelerate)
SuperLU >= 5.2.2
CUDA Toolkit >=12.0 (if building with GPU support)
When gkylzero has completed its installation, the rest of gkyl will build.
gkyl has the following dependencies in addition to depending upon the gkylzero
library:
C compiler (C99 standard)
Python 3.11
MPI compiler with MPI3 support (>=openmpi 3.0 or >=mpich 3.0)
LuaJIT 2.1.0
ADIOS 2.0 (requires CMake to be installed)
CUDA Toolkit >=12.0 (if building with GPU support)
Nvidia Collective Communication Library (NCCL) >=2.18.3 (if building with GPU support)
The following instructions assume that at minimum the user has both a C compiler (C99 standard) and Python 3.11.
Fluid (finite volume) solver install
Currently the finite volume multifluid solver is not in the gkyl main branch.
If you wish to carry out studies with this solver either switch to the
pre-g0 branch (i.e. git checkout -b pre-g0 --track origin/pre-g0) before
installing gkyl and/or please communicate with the developers
to obtain instructions for the best way to install the finite volume solver.
Installing using “machine files” (recommended)
For systems on which gkyl has been built before, the code can be
built in three steps using scripts found in the machines/ directory.
Install dependencies using a
mkdepsscript from themachines/directory:./machines/mkdeps.[SYSTEM].sh
where [SYSTEM] should be replaced by the name of the system you are building
on, such as linux, macosx, or perlmutter. By default, installations will
be made in $HOME/gkylsoft/. Even on systems which have installations of gkyl
dependencies such as MPI, the mkdeps script must be run first to build the gkylzero
library and other gkyl dependencies such as LuaJIT.
Installing in non-default directory
If you wish to install Gkeyll somewhere other than $HOME/gkylsoft/ please change the variable GKYLSOFT near the top of both machine files (i.e. mkdeps.[SYSTEM].sh and configure.[SYSTEM].sh) to point to the desired installation location before running them.
Configure
wafusing aconfigurescript from themachines/directory:./machines/configure.[SYSTEM].sh
NOTE: Steps 1 and 2 should only need to be done on the first build, unless
one wishes to change the dependencies. A successful waf configure, on a
system without GPU support (in this case a Mac OSX system), will look like:
bash$ ./waf CC=clang CXX=clang++ MPICC=/Users/junoravin/gkylsoft/openmpi/bin/mpicc MPICXX=/Users/junoravin/gkylsoft/openmpi/bin/mpicxx --out=build -p /Users/junoravin/gkylsoft --prefix=/Users/junoravin/gkylsoft/gkyl --cxxflags=-O3,-std=c++17 --luajit-inc-dir=/Users/junoravin/gkylsoft/luajit/include/luajit-2.1 --luajit-lib-dir=/Users/junoravin/gkylsoft/luajit/lib --luajit-share-dir=/Users/junoravin/gkylsoft/luajit/share/luajit-2.1.0-beta3 --enable-mpi --mpi-inc-dir=/Users/junoravin/gkylsoft/openmpi/include --mpi-lib-dir=/Users/junoravin/gkylsoft/openmpi/lib --mpi-link-libs=mpi --enable-adios --adios-inc-dir=/Users/junoravin/gkylsoft/adios/include --adios-lib-dir=/Users/junoravin/gkylsoft/adios/lib --enable-gkylzero --gkylzero-inc-dir=/Users/junoravin/gkylsoft/gkylzero/include --gkylzero-lib-dir=/Users/junoravin/gkylsoft/gkylzero/lib --enable-superlu --superlu-inc-dir=/Users/junoravin/gkylsoft/superlu/include --superlu-lib-dir=/Users/junoravin/gkylsoft/superlu/lib --enable-openblas --openblas-inc-dir=/Users/junoravin/gkylsoft/OpenBLAS/include --openblas-lib-dir=/Users/junoravin/gkylsoft/OpenBLAS/lib configure
Setting top to                           : /Users/junoravin/branches-gkyl/g0-merge-build-improve/gkyl
Setting out to                           : /Users/junoravin/branches-gkyl/g0-merge-build-improve/gkyl/build
Checking for 'clang' (C compiler)        : clang
Checking for 'clang++' (C++ compiler)    : clang++
Setting dependency path:                 : /Users/junoravin/gkylsoft
Setting prefix:                          : /Users/junoravin/gkylsoft/gkyl
Checking for LUAJIT                      : Found LuaJIT
Checking for MPI                         : Found MPI
Checking for ADIOS                       : Found ADIOS
Checking for Sqlite3                     : Using Sqlite3
Checking for SUPERLU                     : Found SUPERLU
Checking for OPENBLAS                    : Found OPENBLAS
Checking for gkylzero                    : Found gkylzero
'configure' finished successfully (3.529s)
Manually load the modules at the top of the ./machines/configure.[SYSTEM].sh file, and build the code using:
./waf build install
The final result will be a gkyl executable located in the
$HOME/gkylsoft/gkyl/bin/ directory. Feel free to add this directory
to your PATH environment variable or create an alias so you can
simply call gkyl.
Note that if MPI was built as well as the part of the installation,
$HOME/gkylsoft/openmpi/bin/ needs to be added to the PATH as
well. Finally, on some distributions, it is required to add
$HOME/gkylsoft/openmpi/lib/ to the LD_LIBRARY_PATH environmental
variable:
export LD_LIBRARY_PATH=$LD_LIBRARY_PATH:~/gkylsoft/openmpi/lib
Creating machine files for new systems
For systems that do not already have corresponding files in the
machines/ directory, we encourage you to create machine files
for your machine (and add it to the repository). Instructions
can be found in machines/README.md, and you can use other machine
files as examples.
If you are building gkyl for the first time on a new machine,
you must independently build the gkylzero library following
the instructions in installing from source manually.
An alternative to building gkylzero manually, especially desirable for systems other users will employ, is to:
Create gkylzero machine files.
Commit them to the gkylzero repository.
Create gkyl machine files (as mentioned above).
Add corresponding lines in install-deps/build-gkylzero.sh that call the gkylzero machine files for your system.
Proceed with the installation (running gkyl machine files).
Gkeyll on Power9
Using Gkeyll on IBM Power9 systems (like Summit or Traverse) is not recommended. This is due to incomplete support for the LuaJIT compiler on Power9.
Installing from source manually
If machine files are not available, the dependencies, configuration, and build can be done manually.
The first step is to build the dependencies. Depending on your system, building
dependencies can be complicated. You will need to install the gkylzero library yourself.
The installation of the gkylzero library can be done anywhere, either in your home directory
or in the install-deps directory of gkyl which can be navigated to:
cd gkyl/install-deps
Clone the GitHub repository using:
git clone https://github.com/ammarhakim/gkylzero.git
The installation of the gkylzero dependencies follows a similar procedure to gkyl.
For example, on a Mac or Linux machine you can simply run
the mkdeps.sh script in the install-deps directory. To build dependencies cd
to:
cd gkylzero/install-deps
First, please check details by running:
./mkdeps.sh -h
On most supercomputers you will likely need to use the system recommended compilers. In this case, you should pass the appropriate compilers to mkdeps.sh as follows:
./mkdeps.sh CC=cc CXX=cxx ....
After the dependencies are built, navigate up to the gkylzero/ directory
and run the configure script:
./configure
Many supercomputers have their own builds of OpenBLAS and SuperLU. If
that is the case, one can configure gkylzero to use these installations
instead of installing them yourself:
./configure --lapack-inc=/PATH/TO/LAPACK/include --lapack-lib/PATH/TO/LAPACK/lib ....
and similarly for SuperLU. If you would like to configure with GPU support make sure to configure with:
./configure CC=nvcc CUDA_ARCH=#
where # is the CUDA architecture you are compiling for. For example, the Nvidia A100 uses
CUDA_ARCH=80. You can also edit the configure script directly to pass these input
parameters.
Once the configure is complete, install gkylzero using the Makefile provided:
make install -j#
Where # is some number of cores you would like to compile with. It is strongly recommended you build with some number of cores to reduce the build times, especially on GPUs, but we caution against using all the cores available to you on supercomputing systems where login nodes are shared. Some clusters allow you to build on compute nodes. In this instance, it can reduce build times by asking for a single node job and compiling with as much parallelism as possible.
You can check that gkylzero has successfully installed on your system by building the unit tests:
make unit -j#
make check
If the unit tests pass, gkylzero has successfully installed and you can proceed to the installation of
gkyl. Again, on most supercomputers you will likely need and want to use the system recommended
compilers and MPI libraries. In this case, you should pass the appropriate
compilers to mkdeps.sh as follows:
./mkdeps.sh CC=cc CXX=cxx MPICC=mpicc MPICXX=mpicxx ....
You should only build libraries not provided by the system. In practice, this likely means LuaJIT and ADIOS2. (Many supercomputer centers at DOE already offer ADIOS2 builds and should be preferred instead of your own builds). A typical command will be:
./mkdeps.sh --build-adios=yes --build-luajit=yes
(in addition, you may need to specify compilers also).
By default, the mkdeps.sh script will install dependencies in $HOME/gkylsoft directory. If you install it elsewhere, you will need to modify the instructions below accordingly. Make sure to adjust the installation location for both gkylzero and gkyl consistently so the build system can find the gkylzero library.
Once you have all dependencies installed, you can build gkyl itself by cd-ing to the top-directory in the source. gkyl uses the Waf build system. You do NOT need to install waf as it is included with the distribution. However, waf depends on Python (included on most systems). Waf takes a number of options. To get a list do
./waf --help
There are two build scenarios: first, all dependencies are installed in $HOME/gkylsoft directory, and second, you are using some libraries supplied by your system.
If you have installed all dependencies in the gkylsoft directory you can simply run:
./waf configure CC=mpicc CXX=mpicxx
where CC and CXX are names of the MPI compilers to use. Note that in some cases the full path to the compiler may need to be specified. If the compilers are already in your path, then you can omit all flags.
If you need to use system supplied builds, you need to specify more complex set of paths. Although you can do this by passing options to the waf build script, it is easiest to follow these steps:
Copy the configure-par.sh-in script to configure-par.sh
Modify this script to reflect the locations of various libraries on your machine. In particular, if you are using pre-built libraries you will likely need to change the information about MPI and ADIOS.
Run the configure-par.sh script
Once the configuration is complete, run the following command to build and install (note: if you are working on a cluster and using environment modules, you may need to load them at this point):
./waf build install
The builds are created in the ‘build’ directory and the executable is installed
in $HOME/gkylsoft/gkyl/bin, unless you specified a different install prefix. The
executable can only be run from the install directory [1].
If you need to clean up a build do:
./waf clean
If you need to uninstall do:
./waf uninstall
LuaJIT builds easily on most machines with standard GCC compiler. Often, you may
run into problems on older gcc as they do not include the log2 and exp2
functions unless c99 standard is enabled. To get around this, modify the
src/Makefile in LuaJIT. To do this, change the line:
CC= $(DEFAULT_CC)
to:
CC= $(DEFAULT_CC) -std=gnu99
On some Mac OSX systems, especially older systems such as Mojave, you may need to set the following env flag:
export MACOSX_DEPLOYMENT_TARGET=10.YY
where YY is the version number of the OSX operating system.
For example, to build on OS X Mojave the env flag is:
export MACOSX_DEPLOYMENT_TARGET=10.14
and to build on OS X Catalina the env flag is:
export MACOSX_DEPLOYMENT_TARGET=10.15
Having trouble building? We will try to compile a list of suggestions and common error messages in this troubleshooting site.
Footnotes
Postgkyl install
There are two options for getting Postgkyl. The first option is to get the Conda package and the second is to clone the source code repository. Installing via Conda is preferred for the majority of users as it requires literally a single Conda command. What is more, Conda is already the suggested way of installing all the dependencies. On the other hand, the later option has an advantage of always having the most up-to-date version and is generally required for users that want to contribute to the code.
Postgkyl requires Python 3.11 or higher
The python version of one of the dependencies, ADIOS 2, requires Python 3.11 or higher. Therefore, Postgkyl Conda packages are currently available only for these versions.
Users that installed Posgkyl prior to 2023/08/30 are advised to either create a fresh Python 3.11 environment or reinstall their Conda.
First install Conda (or Mamba, see the note below) and create an environment for Postgkyl (as of 2023/12/14 pgkyl requires python version >= 3.11):
conda create -n pgkyl python=3.11
conda activate pgkyl
Postgkyl can then be installed with Conda with literally a single command:
conda install -c gkyl -c conda-forge postgkyl
Note
Presently (2023/12/14) with standard Conda this install takes an excessive amount of time. One fix is using Mamba instead of conda. Mamba generally is much faster at solving package environments than Conda, and on Perlmutter it was able to install postgkyl under 5 minutes whereas Conda would hang for over an hour during the solving environment step. On Perlmutter Mamba can be loaded by modifiying your module environment as follows (as of 2023/12/14):
module unload conda/Miniconda3-py311_23.5.2-0
module load conda/Mambaforge-23.1.0-1
Installing using Mamba in addition to doing these install commands seperately will help to greatly speed up the install:
conda create -n pgkyl python=3.11
conda activate pgkyl
conda update -n base -c defaults conda
conda install click numpy matplotlib pytables scipy sympy msgpack-python
conda install -c conda-forge adios2
conda install -c gkyl postgkyl
On NERSC conda update -n base -c defaults conda will fail as users
do not have the correct write permissions. Never fear, this command is
not necessary there to successfully install pgkyl.
Note that the flags for channels, -c gkyl and -c conda-forge,
is required even for updating.
conda update -c gkyl postgkyl
The channels can be permanently added by adding the following lines .condarc
in the HOME directory (or creating a new one):
channels:
  - defaults
  - gkyl
  - conda-forge
channel_priority: flexible
Note that this is the recommended order of the channels; it prioritizes more
stable packages from the default channel and only pulls the adios2 packages
from conda-forge.
Creating a Conda environment
To install a new package, users need the write permission for the
Anaconda directory. If this is not the case (e.g. on a computing
cluster), one can either create a Conda environment
(see tip below) or install Conda into the $HOME directory.
To create a Conda environment for postgkyl called pgkylenv, use
conda create -n pgkylenv python=3.11
Then activate the environment with
conda activate pgkylenv
and install postgkyl using the commands above (or the ones below to install from source).
After install, one must have the pgkylenv environment activated
in order to use postgkyl.
Postgkyl source code is hosted in a GitHub repository. To get Postgkyl running, one first needs to clone the repository and install dependencies.
First, clone the repository using:
git clone https://github.com/ammarhakim/postgkyl
Postgkyl has these dependencies, which are readily available thru Conda:
matplotlib >= 3.0
adios2 (on the
conda-forgechannel)
All these dependencies can be easily obtained from the Gkeyll Conda channel, via
conda install -c gkyl -c conda-forge postgkyl --only-deps
Once the dependencies are installed, postgkyl can be installed by
navigating into the postgkyl repository and running
python setup.py install
python setup.py develop
Note that these commands only ever need to be run once (even if one is modifying source code). Changes to the source code will be automatically included because we have installed in development mode.
While the Conda build of Postgkyl is the suggested version for the
majority of users, the source code repository is required for any code
contributions. We should stress that when switching between the
different version, it is strongly advised to remove the other
version. Having both may lead to an unforeseen behavior based on the
relative order of components in the PATH.
The Conda version can be uninstalled with:
conda uninstall postgkyl
Note on the Windows Linux Subsystem (WSL)
Historically, Gkeyll was supported only for Unix-like operating systems. However, since the Windows 10 Anniversary Update in August 2016, it became possible to run Gkeyll even on Windows although with reduced performance. This changed with the introduction of WSL 2 in Spring/Summer 2020. With WSL 2, the performance on Unix and Windows is indistinguishable.
Tip
WSL 2 has its peak performance only when accessing files in the
Linux part of the system rather then the mounted Windows
directories. Therefore, it is not advisable to use locations like
/mnt/c/Users/userid/Desktop/. Instead, working from
/home/userid/ would lead to significantly improved performance.
Requirements:
For x64 systems: Version 1903 or higher, with Build 18362 or higher
For ARM64 systems: Version 2004 or higher, with Build 19041 or higher
For WSL 2 (recommended): Build 18362 and a CPU supporting Hyper-V virtualization
Note
Windows 11 makes the process of installing WSL much easier. See the bottom of this page for additional steps required in Windows 10.
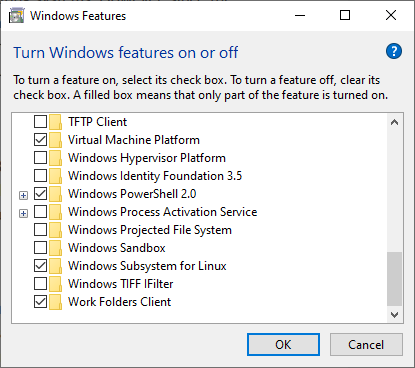
First, WSL needs to be enabled. This can be done either using GUI or PowerShell. For the former, go to Turn Windows features on or off in the Control Panel and check Windows Subsystem for Linux at the very bottom.
Alternatively, this can be done in a terminal (running the PowerShell as an Administrator):
dism.exe /online /enable-feature /featurename:Microsoft-Windows-Subsystem-Linux /all /norestart
Linux distribution of choice is then available directly thru Microsoft Store. Currently, the following flavors are available:
The Ubuntu distribution currently comes very much bare-bones. C compiler and basic libraries (this is important even for running the Conda version of Gkeyll) can be installed with
sudo apt install gcc
Using GUI requires additional dependencies. The official
documentation
recommends installing and testing these with gedit
sudo apt install gedit
To launch your bashrc file in the editor, enter: gedit ~/.bashrc
Tools like jupyter-lab function through a web browser. While this
is not an issue on Windows 11 which does support GUI, it might be more
comfortable to use Windows browser. This can be achieved by launching
Jupyter without a browser using jupyter-lab --no-browser and then
copying the address including the token to a Windows browser of
choice. Alternatively, when using Windows Terminal,
one can also use Ctrl + click.
Even though it is generally not recommended to modify Linux files
using Windows tools, it is often useful to access them, e.g. to open
a pdf. The Linux root, /, can be accessed on Windows at
\\wsl$\<DISTRIBUTION_NAME>.
Popular text editor Visual Studio Code can be used with advantage to work
with WSL files. The Remote - SSH is required.
WSL 1 is the default on Windows 10. To update to WSL 2, virtualization needs to be enabled first (in Administrator PowerShell)
dism.exe /online /enable-feature /featurename:VirtualMachinePlatform /all /norestart
The next step is to install the kernel update package. Finally, set WSL 2 needs to be changed to default (again using PowerShell as Administrator).
wsl --set-version <distribution name> 2
wsl --set-default-version 2
WSL on Windows 10 does not directly support GUI; however, this can be overcome with a 3rd party X-server like VcXsrv (this is our recommended option as the other option does not seem to work on some configurations) or Xming. Note that when using VcXsrv, the Disable access control checkbox needs to be marked when setting XLaunch. Otherwise, the X11 forwarding would not work properly.

Finally, the $DISPLAY environmental variable needs to be set up on
the Linux side.
export DISPLAY=$(cat /etc/resolv.conf | grep nameserver | awk '{print $2}'):0
While this is an official recommendation, it might not work in some configurations. An alternative is below.
export DISPLAY=$(route.exe print | grep 0.0.0.0 | head -1 | awk '{print $4}'):0.0
There is currently a known issue where Windows and Linux clocks might
get desynchronized when the computer sleeps. This might cause issues
with Git and update installation using sudo apt update. There is a
workaround that works until this issue gets patched and that is
manually calling sudo hwclock -s to manually synchronize the time.